Concept - the happy to see a friend shirt
The concept for project is a shirt that lights up in the center when you wave to your friend. This is to enchance the emotion of excitement and happiness of seeing a friend. When you see a friend and are excited to say hi you press a switch which activates the shirt and then when you wave at them the LEDs on the shirt will flicker, immitating excitement and brightening up the mood. If you see a not so close friend though, or simply someone you are obligated to say hi to, you don't have to press the swtich and and the shirt won't light up when you wave at them.
Step 1 - prototyping
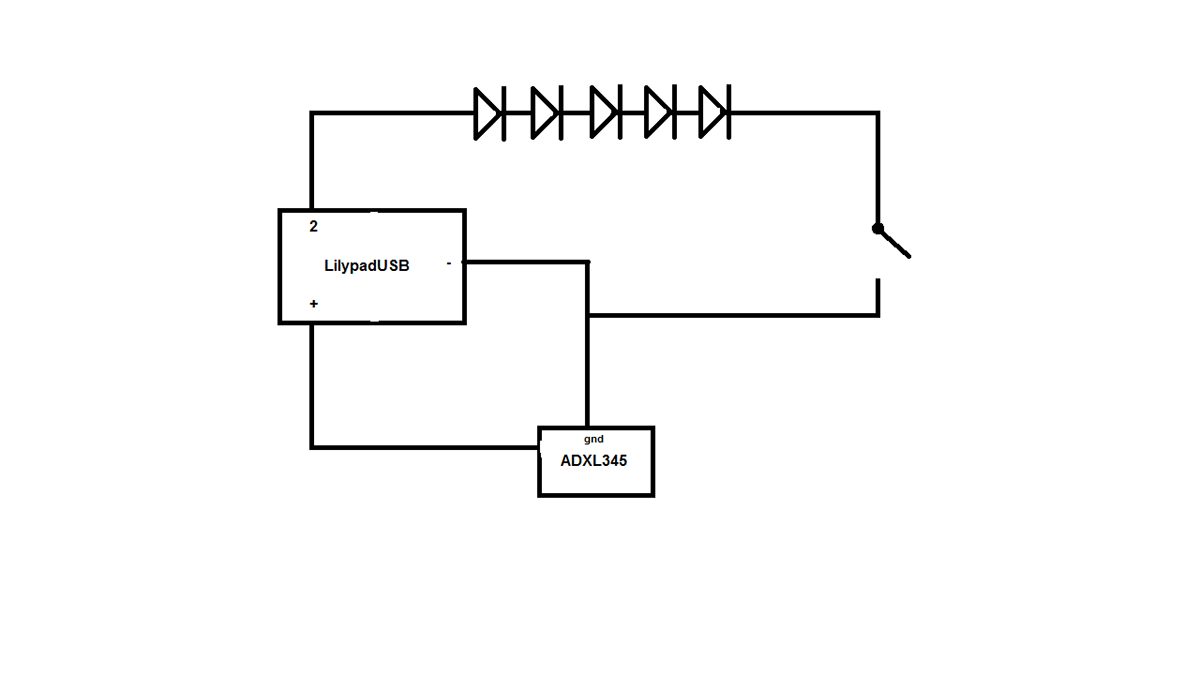
step 1.1 Circuit diagram
step 1.2 - physical prototype

This was a small prototype to check if the code and the sensor was working. The LEDs light up when the accelerometer is tilted one way. This creates a flickering effect when the sensor is tilted back and forth when the wearer is waving.
Step 2 - sewing
step 2.1 - sewing the LilypadUSB

The LilypadUSB is sewn onto the front of the shirt because the shirt was tight enough that the LilypadUSB board made it uncomfortable to wear when I tried to sew it inside. This is the same for the 5 Lilypad LEDs, all sewn on the outside. All the LEDs are connected to pin 2 on the board and are linked in series.

step 2.2 - sewing the ADXL345 accelerometer

The accelerometer is sewn onto the sleeve of the shirt. The accelerometer uses pins 11,10,9 and 3 on the board.

step 2.3 - sewing the soft swtich

The swtich is made from two pieces of fabric with copper tape in the middle of each. A piece of cardboard with a hole in the middle is used to serperate the two pieces, when you need the shirt to turn on just press the hole and that will connect the two copper tapes together completing the circuit.

The softswitch can be placed inside the pouch on the shirt, this hides the button from view and also prevents it from getting caught on stuff as it flaps around when you walk.
Part 4 - coding

This is the basic ADXL345 code example from the ADXL345 quickstart guide. https://www.sparkfun.com/tutorials/240. The code lets the user see the raw data that comes from the accelerometer. This was the code used during the first prototyping. After fiddling around with the code and adding the LED pins, I could control the LEDs by tilting the accelerometer sideways, turning them on or off.
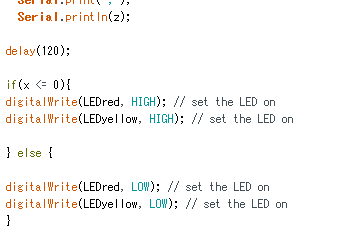

This is the code I added to create the effect of flickering when the accelerometer is waved around. It works by taking the value on the X axis and when the accelerometer is on one side the values of x become negative, turning the lights on. When the accelerometer is tilted to the other side, x becomes postive which then turns off the lights.
Final Product

This is the final form after all the elements have been sewn together. Unfortunately I was unable to figure out how to access the LilypadUSB on arduino for putting in the code and none of the resources I found online were of any help.
